Reassemble the Alarm before proceeding.
Do NOT use glue to attach the Alarm to your BATM.
The Alarm should be removable for service purposes (battery, SIM, etc).
Jump to your BATM model:
BATMTwo
The alarm’s metal base plate has two holes for attaching it to the side of the acceptor.
This location is recommended.
Every BATM2 has these bolts in the same place.
Maximum impact sensitivity.
WARNING: Enthusiastically Inserting or removing the cash box may trigger the alarm.
Replace the upper two bolts (or screws) on the left side of the acceptor.
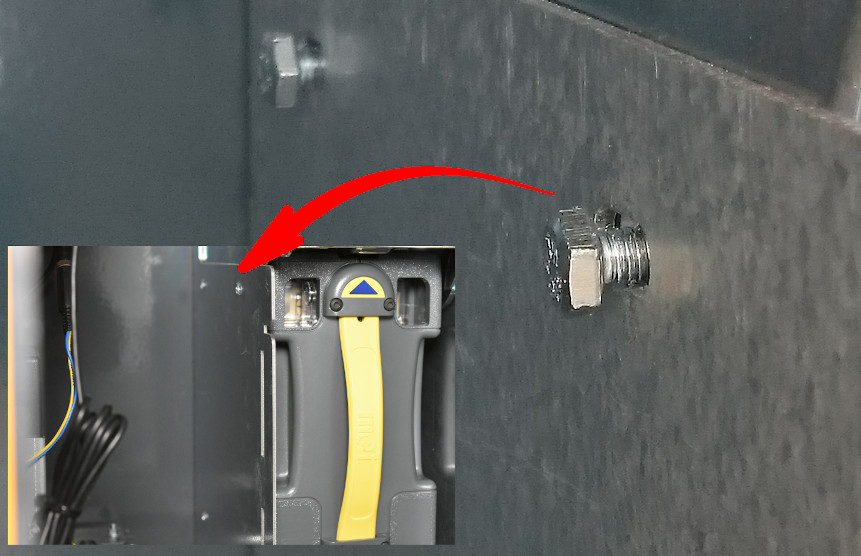
Requires a 7mm hex nut driver (included in the toolkit that came with your BATM2).
Older models: use the Phillips head screwdriver.
Install the longer (4x8 mm) replacement hex bolts (provided with the Alarm).
One spare bolt is included in the package.
Leave the bolts somewhat loose (for mounting the Alarm).
Save the original screws.
If you remove the alarm, you'll need to reinstall the original screws.
The (new) longer bolts will interfere with the cashbox without the Alarm attached.
Attach the Alarm.
Place the alarm on the heads, position it properly, and hand-tighten.
Test the door clearance(s).
Adjust as necessary, then
tighten the bolts snug - do not overtighten!
Connect the USB power cable to the Alarm.
Use any open port on the mainboard (AKAREL7) for the USB-A connection, and run the micro-USB end to the Alarm. Zippy ties are useful for this, and leave plenty of clearance for opening the door(s).
Now see: Operation
BATMThree
The BATM3 offers more versatility in locating your Alarm. Here’s our suggestions.
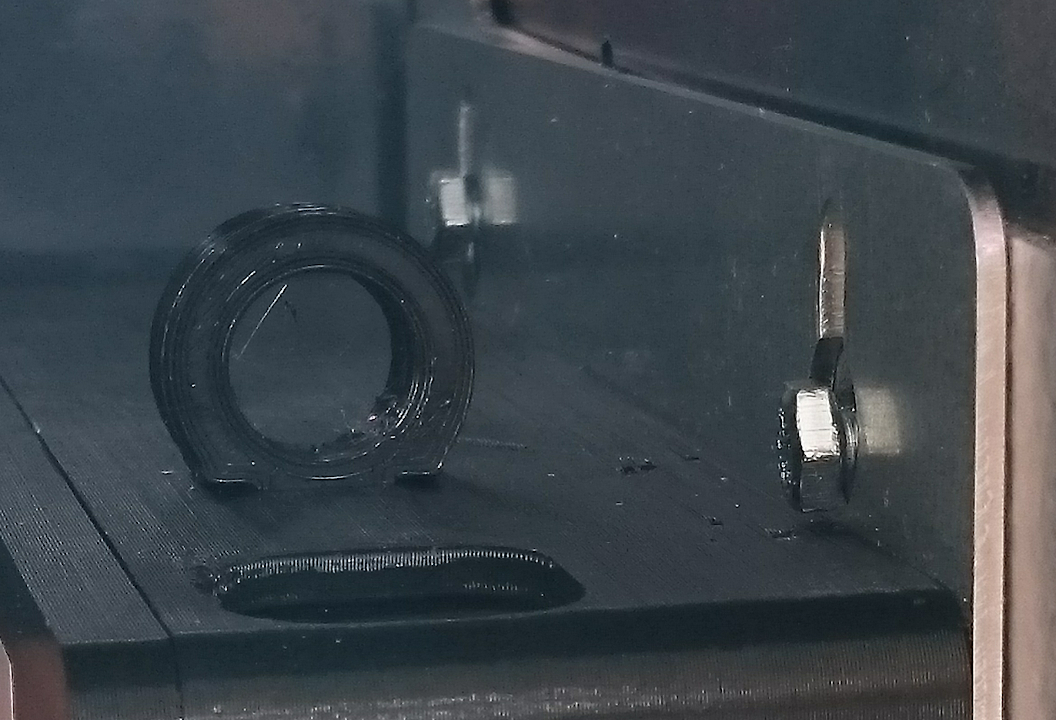
Cable management bar:
Placing the alarm under this ledge is probably the fastest way, but the alarm is quite far away from the expected location of a physical attack, so the alarm sensor may not trip.
To install it there, use the 7mm hex nut driver (included with the BATM accessories) and completely unscrew the nuts that hold the ledge.
Once the nut is removed (don’t lose it), the ledge can be pulled away from the side of the BATM3 and the alarm plate can be slipped under it. Push the ledge back onto the screen - this could require some force. Replace the nut on the screw and tighten it.
Outside Inner Door:
This is probably the best location to place your alarm in a BATM3. It is near any expected hit, so tripping it should not be a problem. On the other hand, an alarm placed on the inside door is more prone to trigger false alarms if you roughly open or close the door.
Placing the alarm in the correct position will take some time and effort.
Please make sure you placed the alarm properly (see pictures). Check that you are able to close and open both doors properly before you finalize the mount!
You can use double sided tape (not included) to fasten the alarm to the door. Please use quality tape, since the surface of the BATM3 is coated and the alarm could be damaged if it falls off during an attempted robbery. We don’t recommend tape.
We suggest you modify your BATM3. Use the attached drilling template to drill two holes (⌀4 - ⌀5) into the door, so you can screw your alarm to that door. You can use the supplied screws and nuts (see BATM2 alarm installation instructions) to install your alarm with the tools included with the BATM3.
Inside Outer Door:
As with the inside door, the outer door will also be a good trigger point, but you’ll have to either use double sided tape to install the alarm or live with exposed screws on the outside of your BATM.
Please make sure you placed the alarm properly (as shown).
Check that you are able to close and open all doors properly.
Connecting USB power cable to motherboard
Once you’ve fastened the alarm, connect the USB cable to the alarm. An adapter has been provided for that purpose (no standard USB “A” ports should be available).
WARNING: Read and follow these instructions carefully!
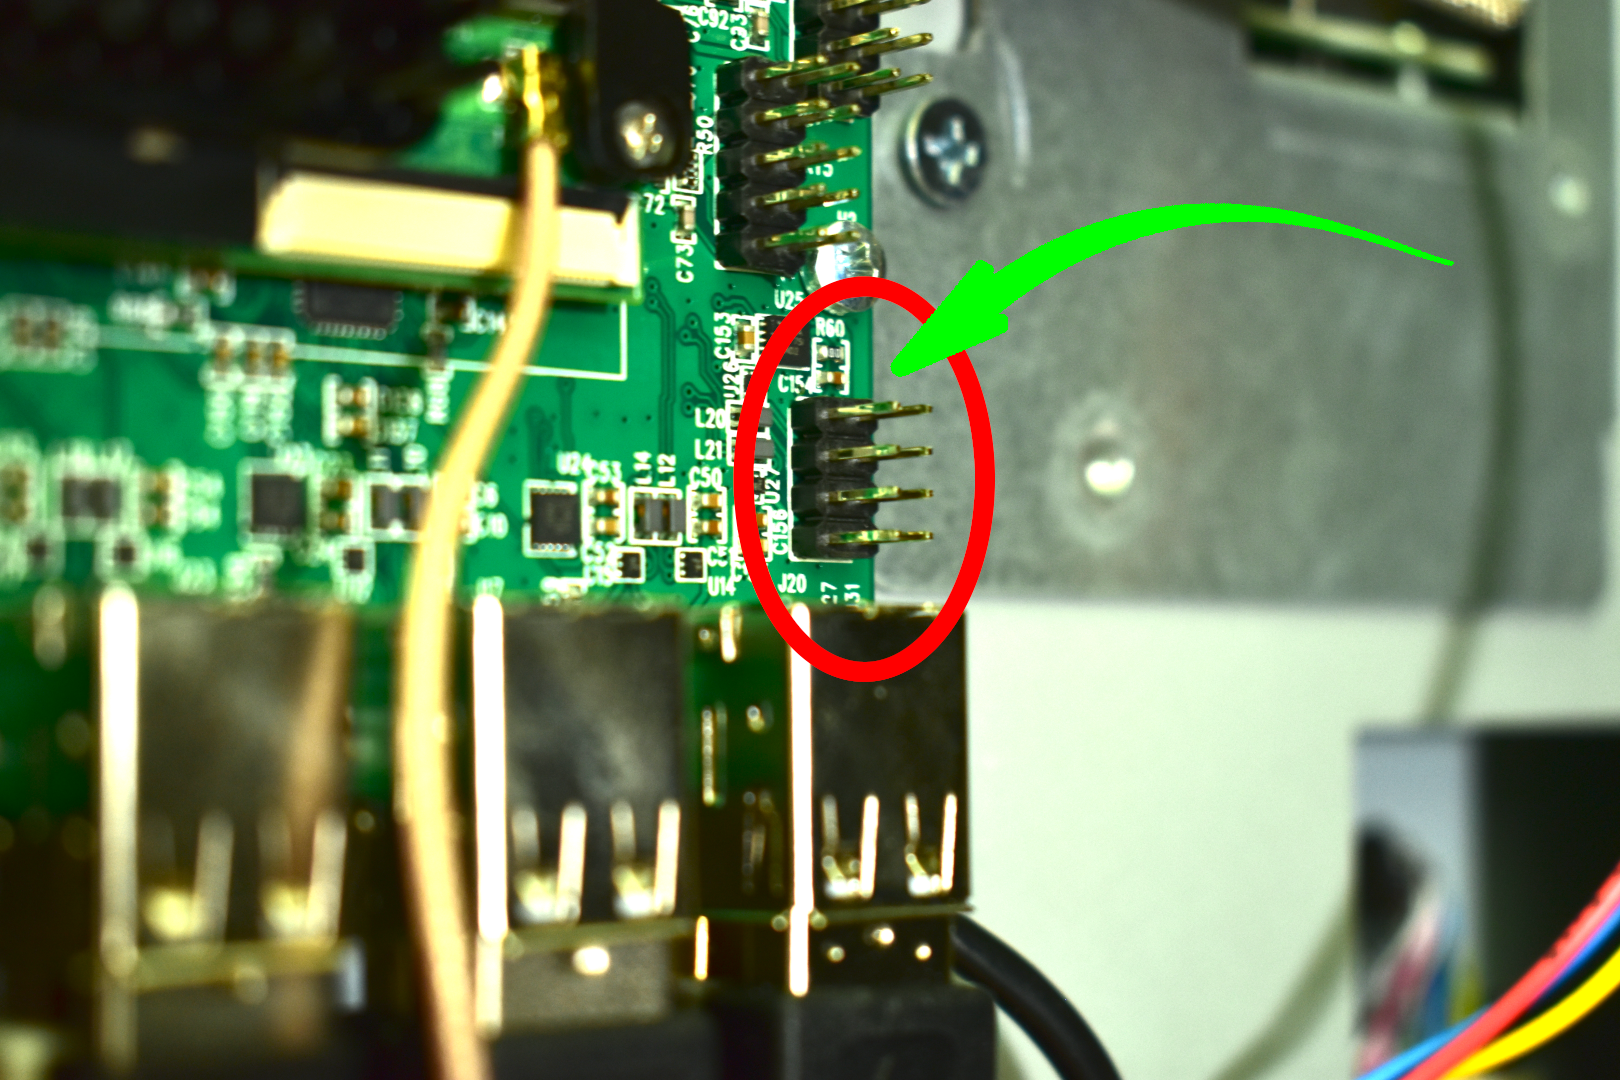
Locate the connector (pin headers) on your motherboard - on most versions: bottom right. It is located under the screw (hole) H2 and above the standard USB “A” connector bank. See image for easier location.
If you own a CPU upgrade for your BATM3 it is possible that your motherboard is spun 90° clockwise. If that’s the case, look for the printed text “generalbytes.com”. This will orient you and help you define what’s “up”.
BATMFour
BATMThree
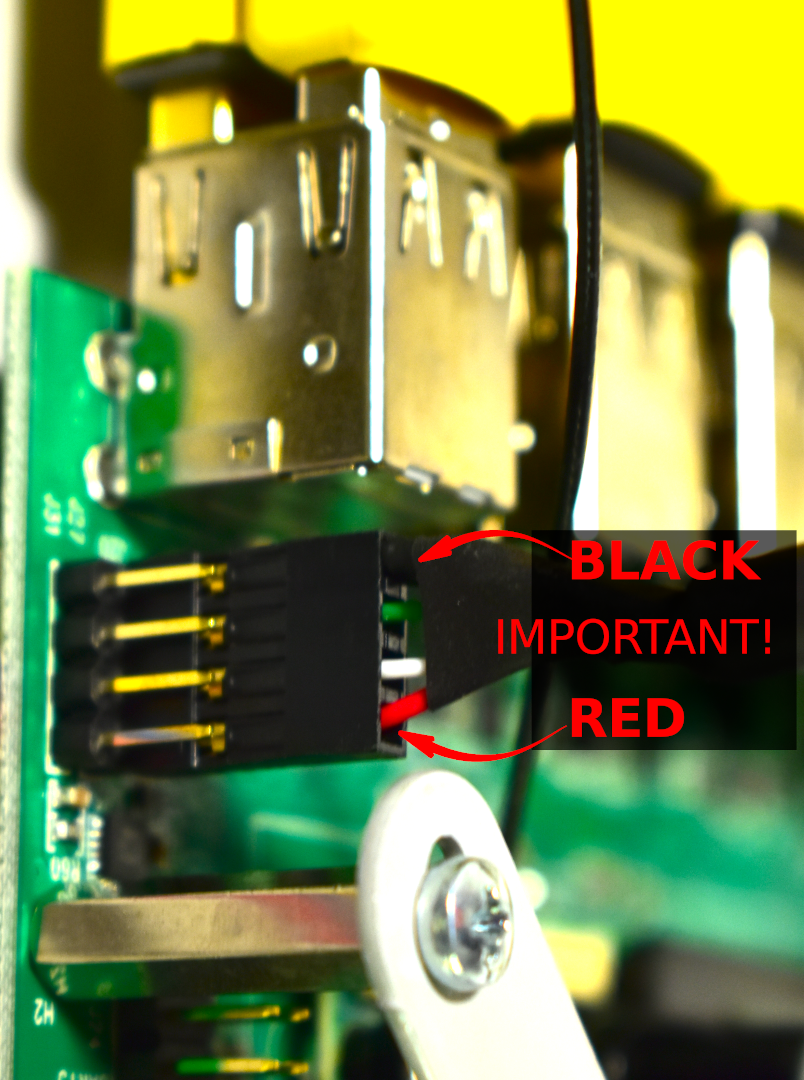
These pins are 2 USB ports that can be used with the supplied adapter. Use the left column of pins. Connect adapter onto the headers as shown in this picture.
CRITICAL: Red wire goes to the top pin! Black wire goes to the bottom pin!
This new port will supply power to your alarm.