...
...
...
...
...
...
...
...
CRYPTX IS OFFLINE UNTIL FURTHER NOTICE.
From CryptX on April 8, 2022:
We are writing to remind you that CryptX Wallet is temporarily offline. While the service is paused, please make sure you do not deposit funds to any addresses belonging to CryptX Wallet. Funds received in Cryptx Wallet addresses after April 10, 2022, cannot be accessed and will not be returned to you. To prevent any loss of funds, please make sure you have removed all CryptX Wallet addresses from any linked program interfaces and exchanges.
If you still have balances at CryptX Wallet received prior to going offline, and you have not yet communicated with us, please simply respond to this email and we will send you transfer details to confirm the return of these funds to you.
Although the current service has been temporarily decommissioned, we are continuing to work on a renewed wallet product. This is planned to be released later this year with an improved and expanded feature set including an integrated fiat conversion feature and liquidity bot. We will regularly update you about the progress.
Thank you again for your support and trust in us for your wallet needs.
Archived instructions:
...
The CryptX Exchange is based in Georgia.
Fiat supported: EUR
Coins offered: BTC, LTC, BCH, USDT and ETH
Login: https://
...
...
...
:
Navigate to: https://
...
...
...
...
Grant all privileges to the token:
...
Disable 2FA for the token:
...
Save the generated Token:
...
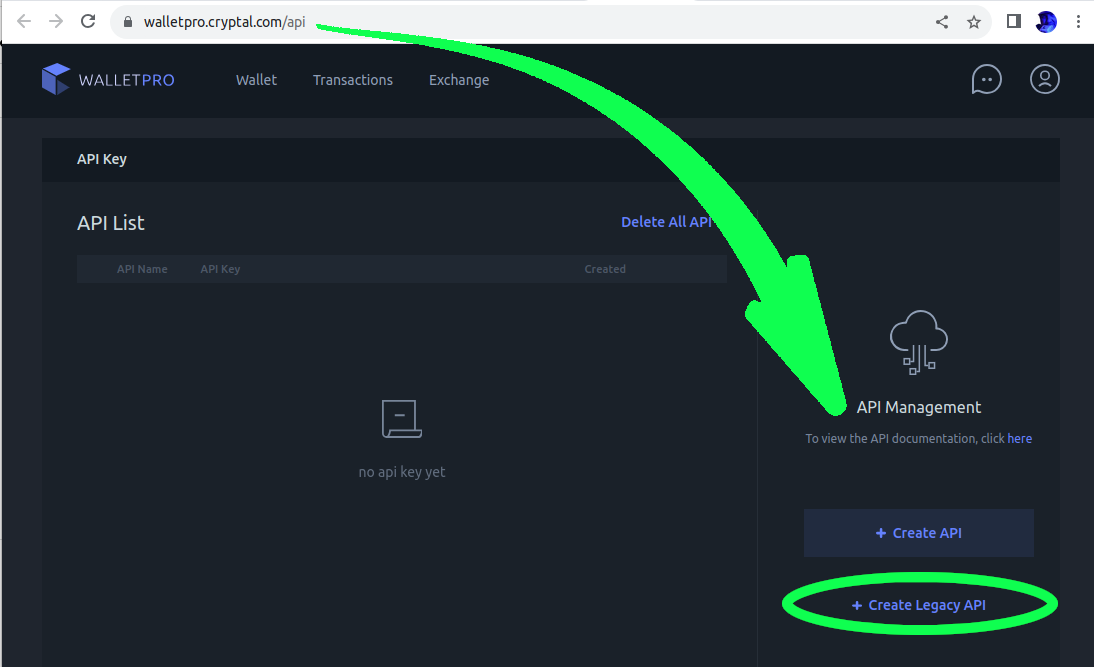
...
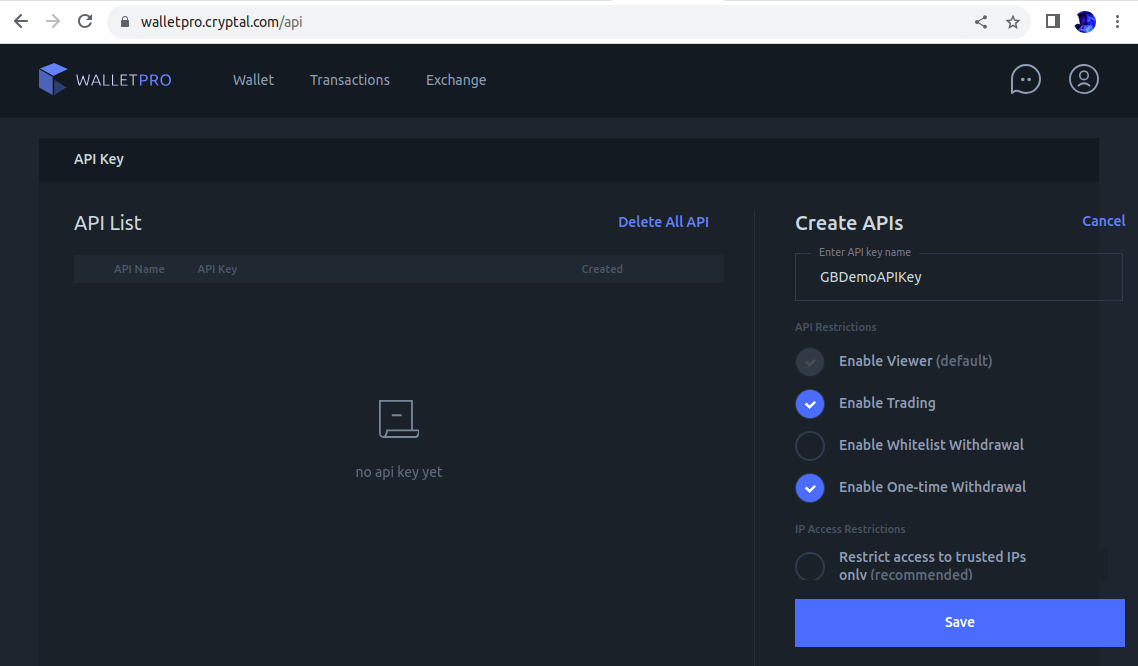
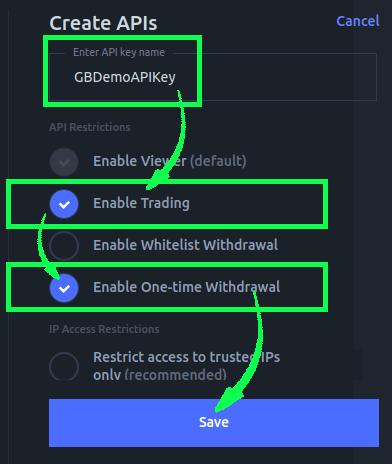
Name the API key something relevant and recognizable.
Select:
Enable Trading
Enable One-time Withdrawal
Save the new API key.
Enter your 2FA to confirm
...
(example Token: fff261ff0bd0e92c99b47f081b4fd694247777ce93f54b5f6e3ab2926a7ed36d)
API key permission.
Save your new API Key (“token”):
(API Key used in this example: ZhCtwqkBHGc2T32DNKbxpeXE)
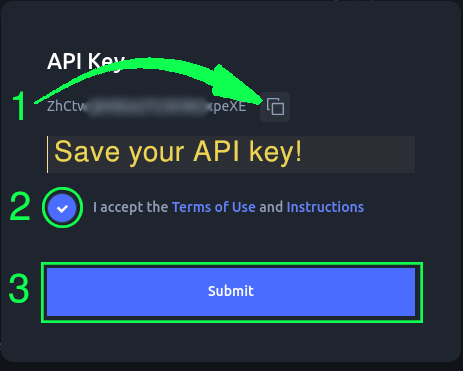
Copy your API key,
save it somewhere secure (you can’t access it again),
accept the TOU, and
Submit.
2. Locate your Wallet ID
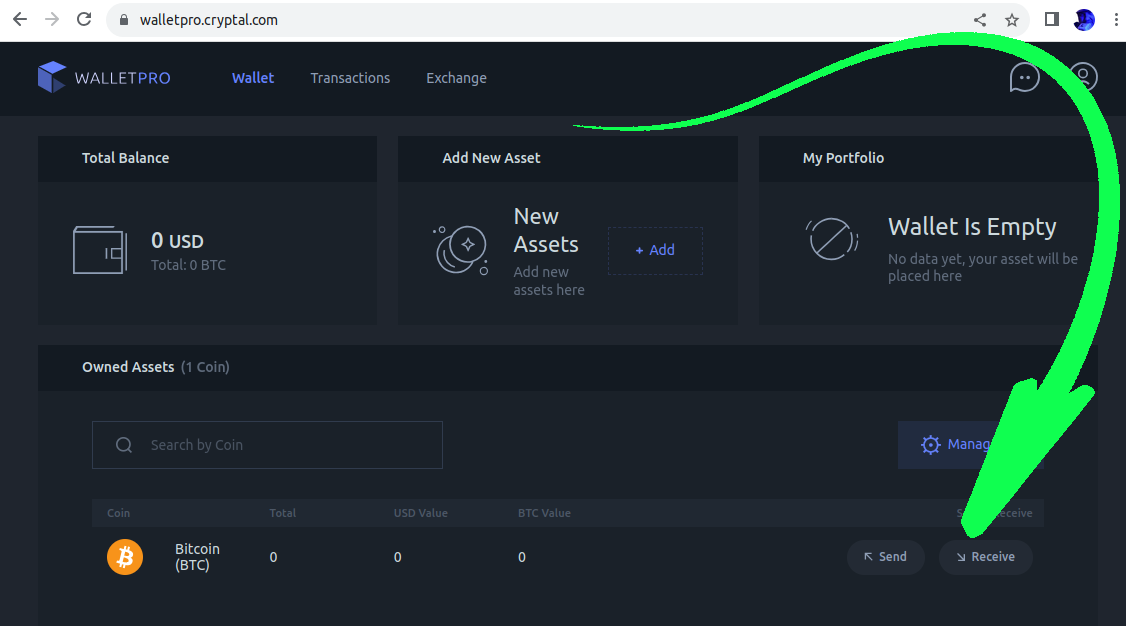
From the appropriate wallet, select “Receive”:
Add a Receive address (if one doesn’t already exist):

Name the address anything relevant
Locate the relevant wallet_id* Crypto Setting parameter:
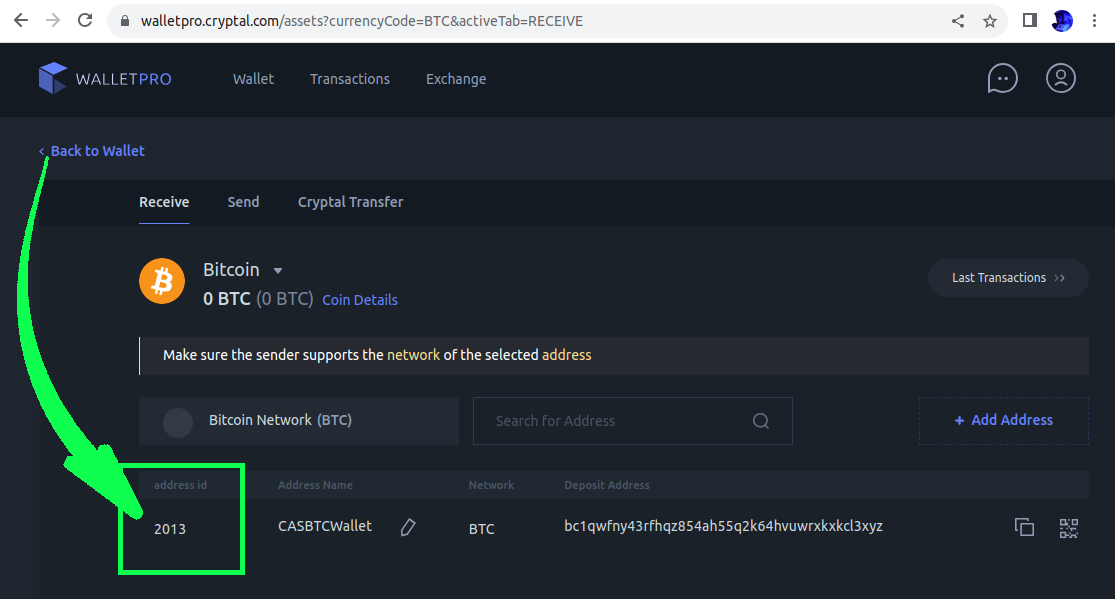
in this example, the wallet_id would be “2013”.
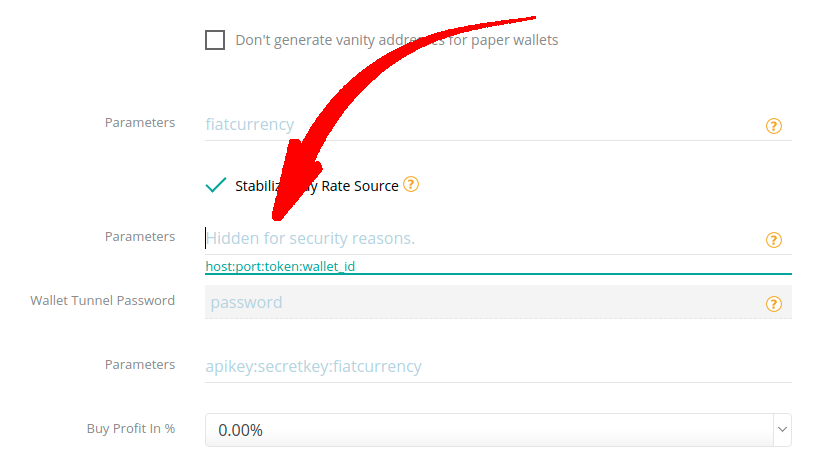
3. Assemble the required CryptX parameters:
Parameters marked * are required, all others optional.
host* : port : token* : wallet_id* : passphrase : priority : max_custom_
...
fee
host*
...
is always: https://api.walletpro.
...
cryptal.com/
port: (leave empty/blank)
token*: the API Key obtained from CryptX as described in Step 1 (above).
wallet_id*: the name of the wallet on CryptX
...
(as located in Step 2 above).
passphrase:the wallet passphrase (if used).
priority: high, medium, low, or custom.
high: (default) = 2 blocks, medium = 8, low = 24
custom - also indicate the number of required blocks (e.g. custom:12)
max_custom_fee: the maximum fee (in s/vByte) when "custom" priority is used
max_custom_gas_limit:
...
Select your wallet:
...
Locate your WALLET_ID in the wallet Settings:
...
is obsolete and no longer used. Do not enter a value.
Example parameter string from the examples above:
https://api.
...
walletpro.cryptal.com/::ZhCtwqkBHGc2T32DNKbxpeXE:
...
2013::custom:12:120
...
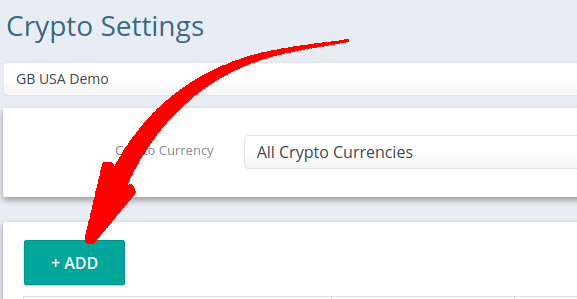
Add a new Crypto Setting in CAS.
Select CryptX as a Hot Wallet.
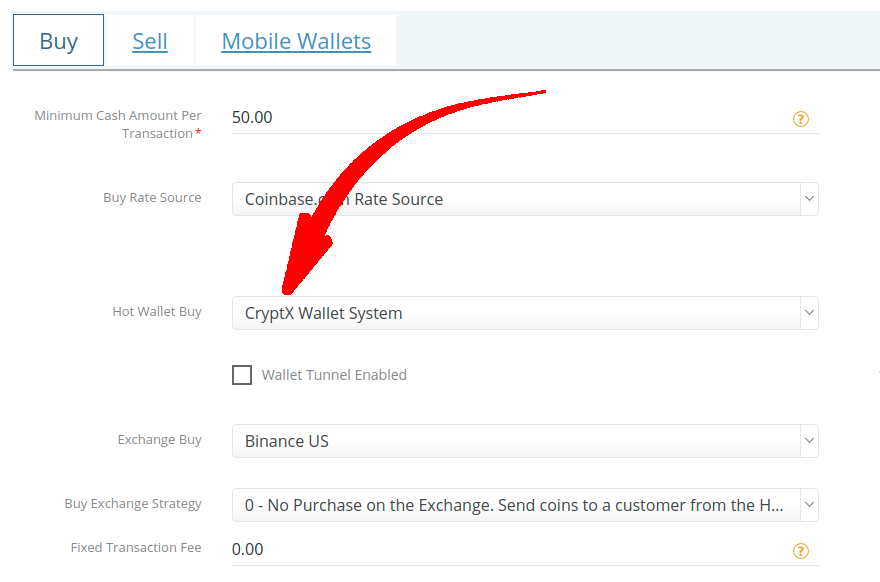
Enter the Parameters as assembled previously.
Save the Crypto Setting:

Re-enter the Crypto Setting, and test it
...
If everything is setup correctly, the test should pass:
...
.
| Tip |
|---|
Test your settings before deploying them.
|
Secure it:
After verifying that your API Token works as expected, we encourage you to increase security.
Add your CAS server IP to the API IP whitelist, if desired (you may also leave it blank).
Set limits.
You’ll have to create a new Token on CryptX to implement these features.
DO NOT enable 2FA for the Token.