This guide is designed to help you install the Enterprise (Standalone) version of WhaleBooks.
NOTE: Everytrade.io changed to WhaleBooks on August 1, 2022. You may see interchangeable references as the wrinkles are ironed out. We apologize for any confusion this may cause.
Required to proceed:
Virtual Private Server (VPS) with a bare installation of Ubuntu 20.04 LTS and a public IP.
We recommend Digital Ocean: Digital Ocean VPS Instructions
8GB RAM
20GB hard drive free space
1. Acquire a License Key
A license key must be purchased from WhaleBooks and keyed in during installation.
First, you’ll need to log in (or create a free account).
Navigate to your profile page: https://WhaleBooks.com/profile
Select (or create, then select) your Organization:
Click “UPGRADE YOUR PLAN”.
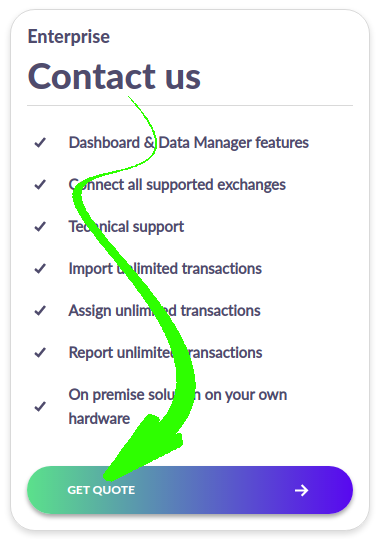
Request a quote from the pricing page:
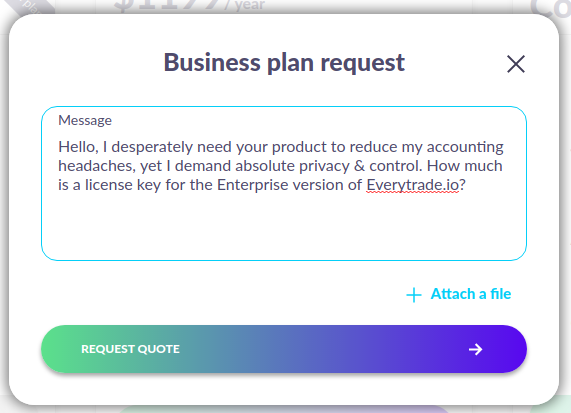
And you’ll receive confirmation of the request:
You’ll receive your key after negotiating with the WhaleBooks Sales team.
Key in hand, you’re ready to install.
Login to your server.
Your user account must have sudo privileges (or login as root).
Install the software:
curl -s -O https://raw.githubusercontent.com/whalebooks-io/whalebooks-install/master/install.sh && sudo bash install.sh
Enter your license key when prompted.
The installation will take a few minutes.
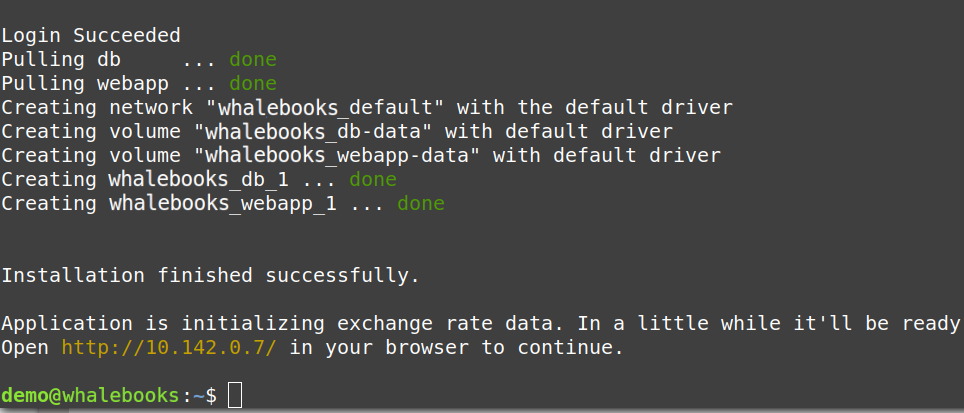
Installation success:
Note that the provided URL may not be accurate. It depends on your choice of VPS. In this example, only the LOCAL IP was displayed. The PUBLIC IP may different, and can usually be deduced with this command:
curl -4 ipv4.icanhazip.com
So, in this example, I’d navigate my browser to:
http://35.185.52.255/
And here it is!
WAIT! You’re not done yet!
In case you didn’t notice, the connection is insecure. Do you really want to share your accounting information with the world? I didn’t think so. You’ll need to secure your site with TLS encryption.
Install Let’s Encrypt (for TLS/HTTPS):
This section depends on software outside the span of our control. We’ve tried to provide accurate instructions, but the software developers may change Ubuntu & Let’s Encrypt at any time - without warning or explanation. Here are some resources for you to consult if something in this section doesn’t quite work the way we describe:
Let’s Encrypt: https://letsencrypt.org/docs/
NGINX: https://docs.nginx.com/nginx/admin-guide/installing-nginx/installing-nginx-open-source/
Docker: https://docs.docker.com/
To proceed, you’ll need a permanent Public IP. Some VPS providers offer “ephemeral” IP’s - and they change from time to time. A certificate from Let’s Encrypt is only valid for permanent IP’s, and thus won’t work (for long) with any other type.
Let’s Encrypt doesn’t issue certificates for bare IP addresses, only domain names. You’ll need to register a domain name in order to get a Let’s Encrypt certificate.
Let’s Encrypt certificates must be renewed every 3 months. Even “free” has its costs! If you choose a different provider, use their instructions instead, and skip to this section below: Modify your WhaleBooks configuration file
If you don’t already have a website, then you’ll need to make the leap into this century. Sorry to be the one to tell you. Obviously, you can’t use a domain name that is already taken. Microsoft (for example) has already claimed microsoft.com - and you can’t use it. Get your own domain name.
If you want a dedicated website, purchase & register the domain (e.g.
mywebsite.com) with a registrar and point it to the permanent Public IP used by your WhaleBooks server. It doesn't matter what the domain name is for the purposes of this guide.If you want to add a subdomain to your existing website (e.g.
http://mywebsite.com/whalebooks, then create a new DNS type "A" record pointing to your WhaleBooks server. This saves you from having to register (and annually renew) a domain name.
Either way, at this point you should have a proper URL for registration with Let’s Encrypt.
We’ll assume your doing a dedicated website, and the fully qualified domain name (FQDN) is:
mywebsite.com
Configure NGINX
1. Edit the NGINX configuration page:
sudo nano /etc/nginx/sites-enabled/whalebooks
2. Locate this line: server_name 35.185.52.255 and change it to: server_name mywebsite.com
3. Save the file (Ctrl-X, and “Y”, do not change the filename).
4. Check the NGINX config file to make sure it’s correct.
sudo nginx -t
should result in:
5. Restart NGINX:
sudo systemctl reload nginx.service
Acquire & Install a Certificate from Let’s Encrypt
Use certbot to automate the authentication:
sudo certbot --nginx -d mywebsite.com
Enter an actual valid email for reminders,
Agree to the terms and conditions,
Choose “2: Redirect” to force all traffic to be encrypted via TLS.
You should receive confirmation of success after completion:
Modify your WhaleBooks configuration file:
sudo nano /var/lib/docker/volumes/whalebooks_webapp-data/_data/config/whalebooks.properties
1. Change mail.from.name=35.185.52.255
to: mail.from.name=mywebsite.com
2. Repeat the same change for the line: url=http://35.185.52.255 (change “http” to https” as well):
3. Save the file (Ctrl-X, and “Y”, do not change the filename).
4. Restart the Docker container:
sudo docker restart whalebooks_webapp_1
Done! Your website should now be securely implementing TLS encryption.
Google Login Setup (optional / advanced)
Set up a Google Client ID for your WhaleBooks installation by using this guide: https://support.google.com/cloud/answer/6158849?hl=en
Edit the file
/var/lib/docker/volumes/whalebooks_webapp-data/_data/config/whalebooks.properties.sudo nano /var/lib/docker/volumes/whalebooks_webapp-data/_data/config/whalebooks.properties
Locate the line starting
auth.google.clientId=and insert your Google Client ID from previous step.Save the file (Ctrl-X, and “Y”, do not change the filename).
Restart your docker container by running
sudo docker restart whalebooks_webapp_1.Use your browser to load
mywebsite.com.
From now on you should be able to use your Google accounts for signup or login.
WhaleBooks Upgrade
Upgrading WhaleBooks to the latest version is easy. All you need to do is to run following script and your installation will be upgraded to the latest version. There is no need to backup any data.
curl -s https://raw.githubusercontent.com/whalebooks/whalebooks-install/master/upgrade.sh | bash
To upgrade to a specific version use a sightly modified command (don't forget to substitute VERSION_NUMBER with the actual version you want to upgrade to):
curl -s https://raw.githubusercontent.com/whalebooks/whalebooks-install/master/upgrade.sh | bash -s -- --version VERSION_NUMBER
WhaleBooks Uninstall
Delete certbot configuration for your domain in case out decided to go for the HTTPS setup
Substitute
mywebsite.comwith your actual domain/certificate name:
certbot delete --cert-name mywebsite.com
If you're not sure about your certificate name, you can list all the certbot managed certificates:
certbot certificates
To remove the NGINX reverse-proxy configuration for WhaleBooks, run:
rm /etc/nginx/sites-available/whalebooks
rm /etc/nginx/sites-enabled/whalebooks
systemctl reload nginx.service
To stop the docker containers running WhaleBooks webapp and database, run:
docker container stop whalebooks_webapp_1
docker container rm whalebooks_webapp_1
docker container stop whalebooks_db_1
docker container rm whalebooks_db_1
Now there are no more WhaleBooks-related processes running, but there's still some runtime data left (configuration files, database content, etc.) To remove those, run:
docker volume rm whalebooks_webapp-data
docker volume rm whalebooks_db-data


