These instructions will help you configure a Crypto Setting for the Bitstamp Exchange.
1. Login to your account at: https://www.bitstamp.net
2. Create your API keys on the Bitstamp website.
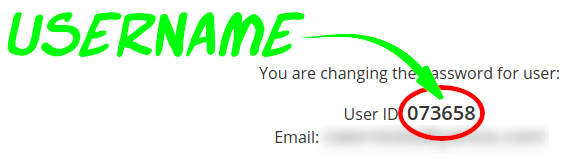
Find your "username" parameter:
Navigate to: https://www.bitstamp.net/account/change_password/
Navigate to the "API Access" screen.
Create/add a new API Key.
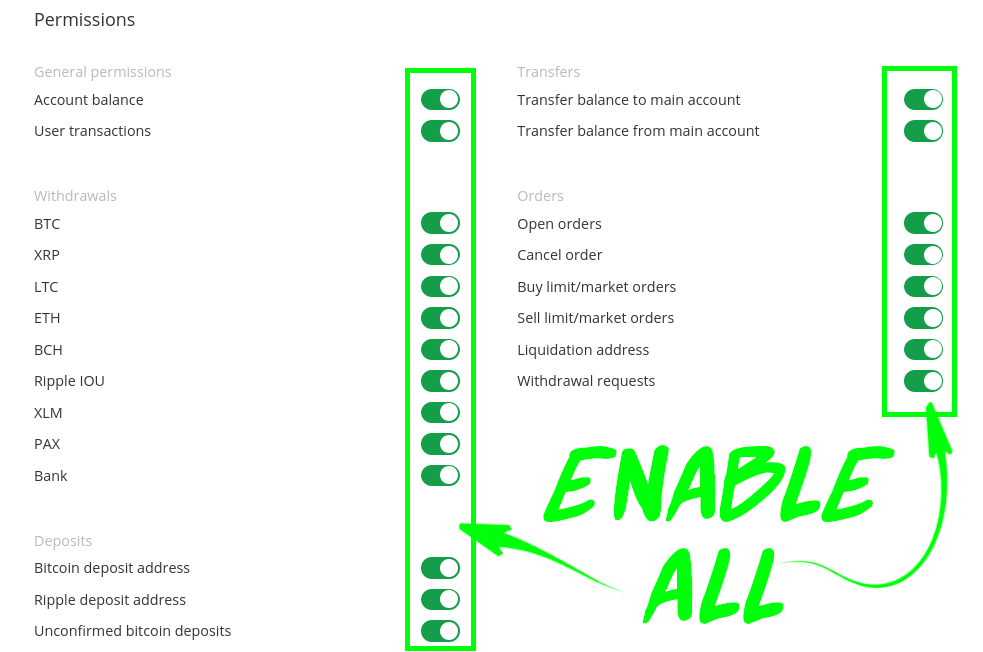
Select all permissions:
Generate the key:

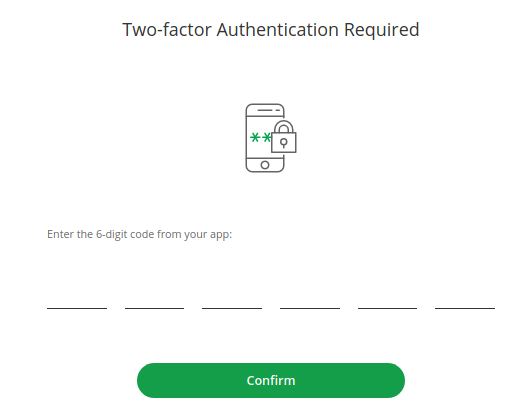
Verify your 2FA:
Save the generated API Key & Secret Key, and request activation:
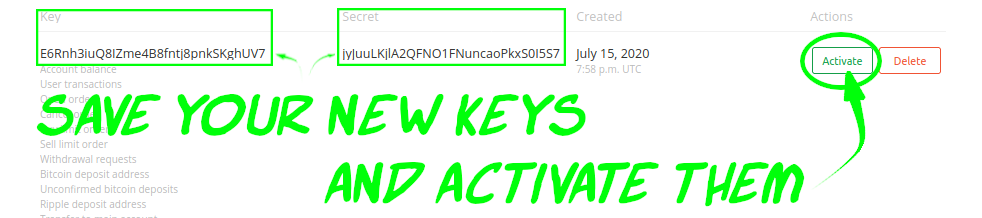
Wait for the activation email from Bitstamp, then activate the key:
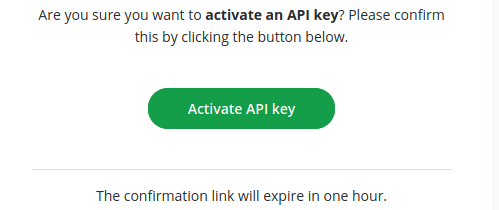
After the email verification is finished, the key will be active.
3. Finally, enter the required parameters into CAS:
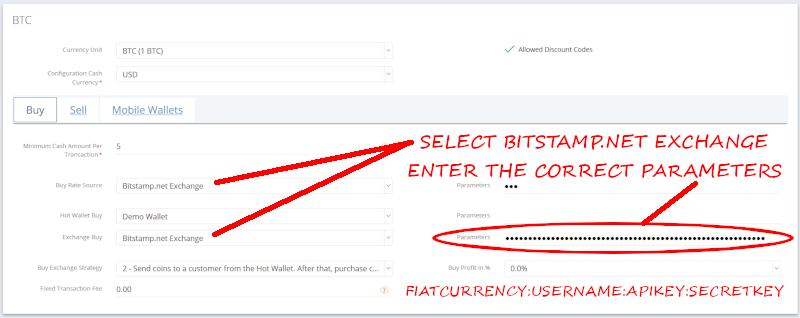
Select Bitstamp.net Exchange
Parameters: fiatcurrency : username : apikey : secretkey
fiatcurrency may be "USD" or "EUR".
username was determined in step 2 above.
apikey and secretkey were determined in step 2 above.
In this example, using the above, our "Parameters" looks like this:
USD:073658:Petanz7pjEFBqAdGZEeii5OdOc9PDIkP:zJqe9Ud9n8gWL42a3gDV1R85vbJhAfHi
4. Save the Crypto Setting!

5. Test it (you’re done):
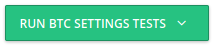
Test your settings before deploying them.
Save your setting first,
return to the same Crypto Setting,
run the test(s).
If the "Exchange Buy" test is successful, you've configured the Bitstamp.net Exchange properly!
Transactions at the BATM will fail if the amount is less than the Bitstamp minimum (normally $20).