This guide is designed to help you connect your CAS to a working BitGo Express server.
If you do not already have an operating server, please see: Setup a BitGo Express Node
BitGo Express is designed and written by BitGo for their BitGo website wallet.
BitGo holds and secures your cryptocurrency keys.
BitGo Wallet is a hot wallet option in the Crypto Application Server (CAS).
BitGo Express is used to interface with BitGo. CAS does not interact with BitGo directly.

1. Assemble your BitGo Express parameters for CAS:
Parameters are host : port : token : wallet_id : wallet_passphrase
Your actual host & port will be reported by BitGo Express:

port: 3080 is the default port, and is used in most every case & examples below.
Understanding “host”:
The “host” is where CAS will steer RPC communications: the target server. The server will vary upon your implementation, and the IP will vary depending upon your actual assigned IP for your server.
The GB Cloud CAS requires use of the GB Wallet Tunnel.
host: is normally http://localhost when
a) using a SSH tunnel, or
b) running on the same server as CAS.
These options are NOT available when using the GB Cloud CAS.
when using the GB Wallet Tunnel, the host is the target BitGo Express server,
e.g. “http://123.123.123.123”
The GB Wallet Tunnel will attempt to connect to your BitGo Express server at that IP.
This option is required when using the GB Cloud CAS.
2. Prepare your developer API token at BitGo.
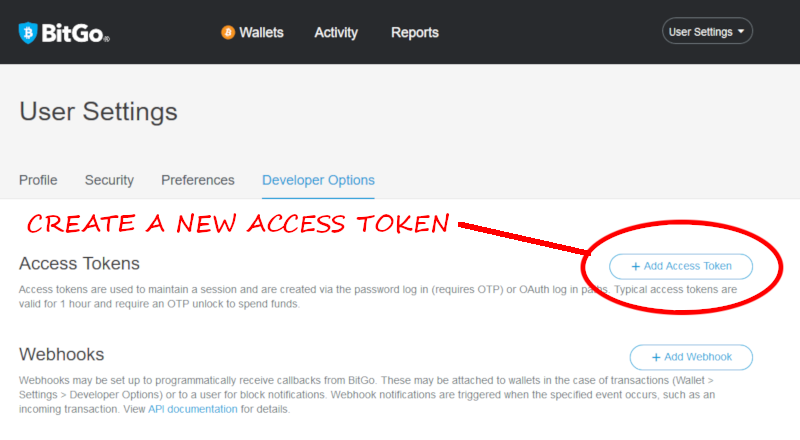
To create a new access token:
Navigate to: https://www.bitgo.com/settings#developerOptions
Click + Add Access Token
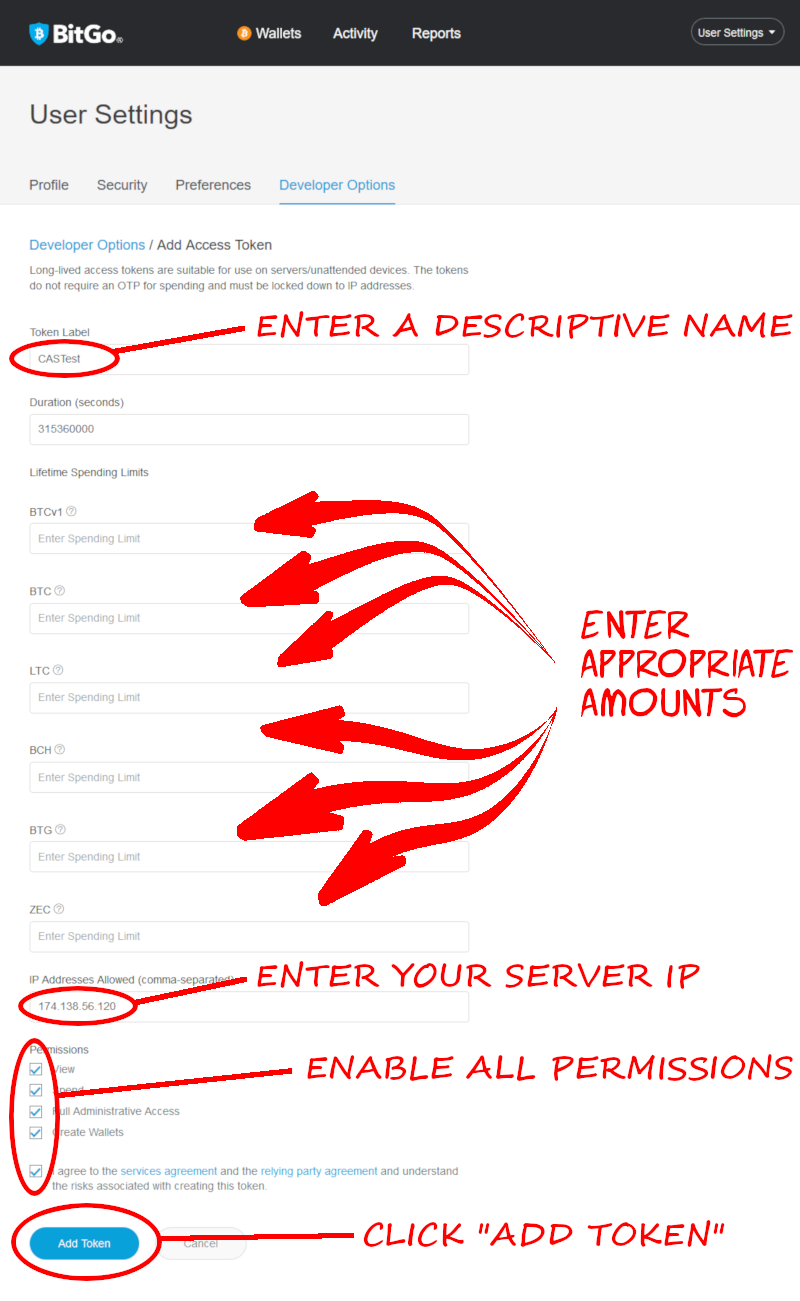
Enter a descriptive name for the API token.
Enter your BitGo Express server IP.
Enable all permissions by checking all boxes.
Agree to the terms, and click "Add Token".
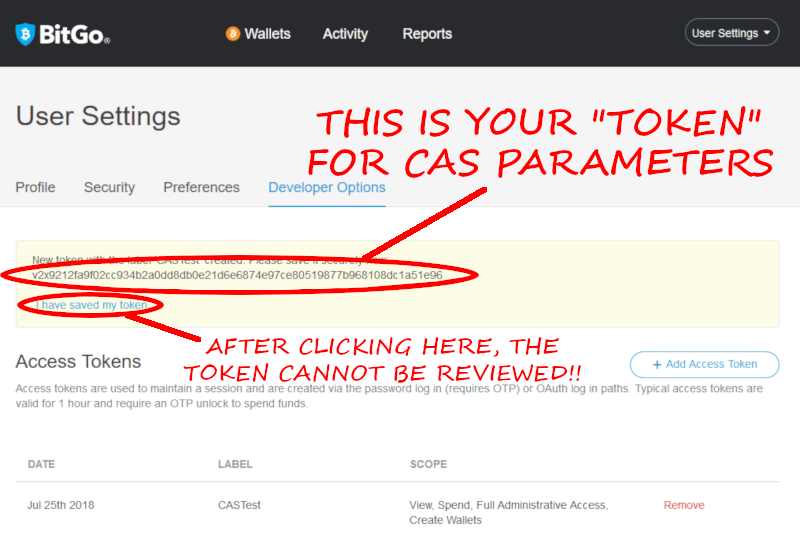
The next screen reveals your developer API token. Save it!
It cannot be displayed again!
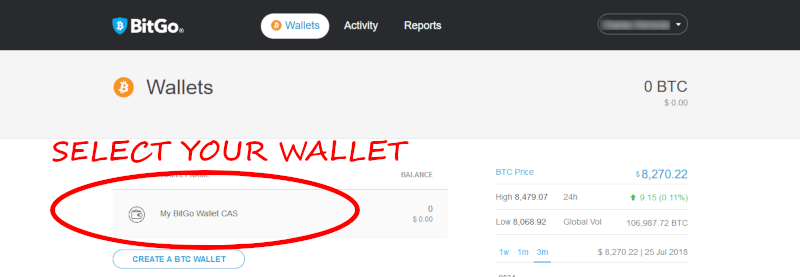
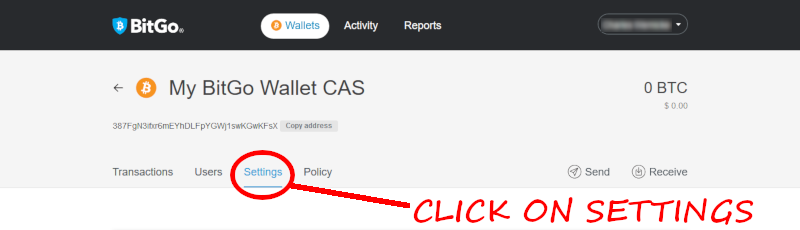
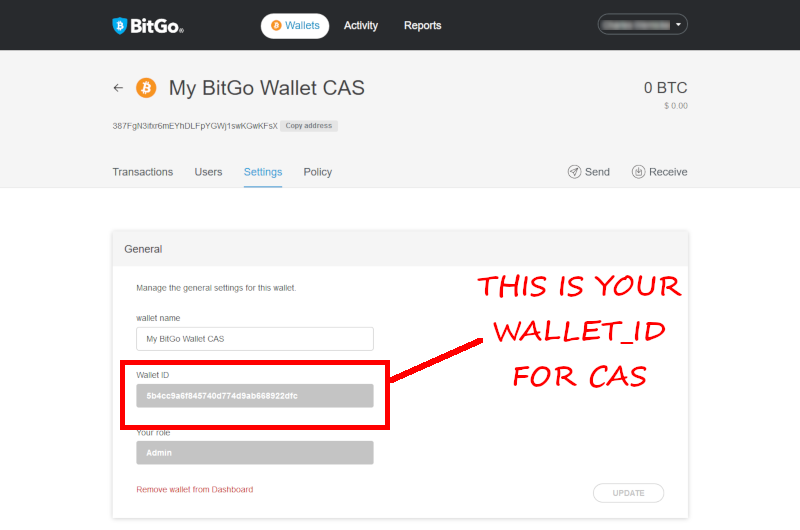
Locate your wallet_id in your BitGo wallet settings:
Determine your wallet_passphrase.
Normally this is your account password -unless- you created a new wallet and chose a separate password (which is recommended).
3. Enter the assembled parameters into CAS:
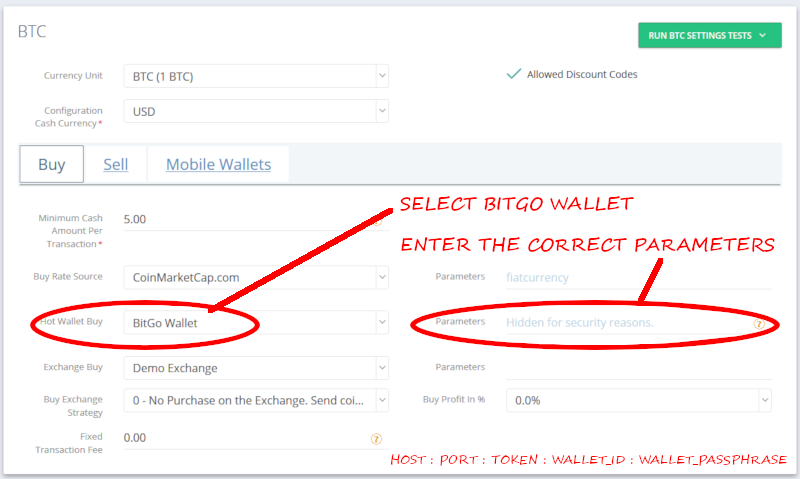
Select BitGo Wallet
Parameters: host : port : token : wallet_id : wallet_passphrase : num_blocks
num_blocks (optional, default=2): the estimated number of blocks for confirmation. The lower the number, the higher the mining fees (but confirmation is faster). See: this Bitgo article.
In this example, using the above, our "Parameters" looks like this (all one line):
http://localhost:3080:v2x922bc21177ad708ebbce21fbd7bb4faba5e5f71d7364a901ac6387bd18402aa4:5b58f06d239b32e506435b664b72945d:b788PqEE8cwtFP8nsJTd
4. If using the GB Wallet Tunnel, enable it and enter the tunnel password:

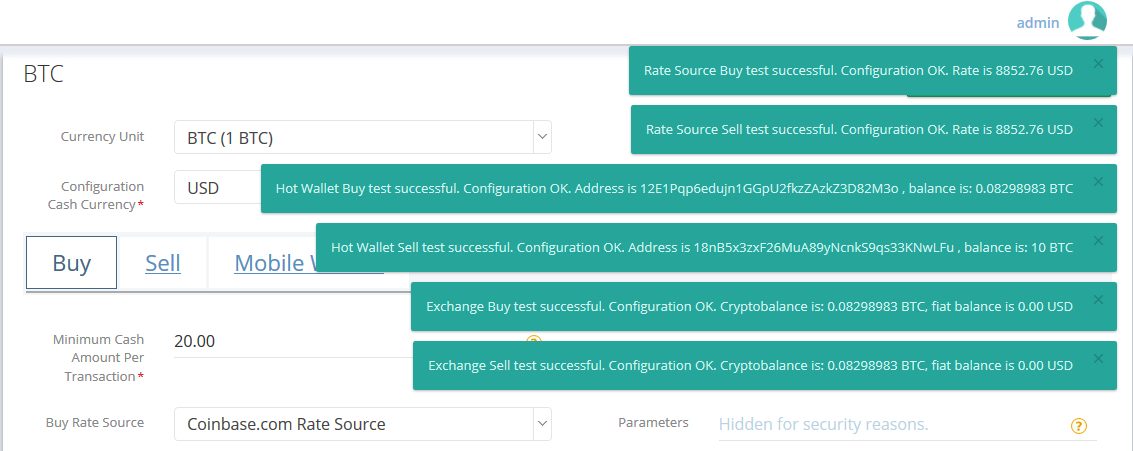
5. Save the Crypto Setting!

6. Reload the Crypto Setting, and test what you just saved: